PACK
AND DEN ACTIVITIES
WATER
SAFETY
Circle Ten Council
Before you take your pack or
den out for any water-related activities, please read:
Safe Swim Defense
Home Swimming Safety Rules
Water Rescue
Safety Afloat
PLAY SAFE
AND HAVE FUN
Circle Ten Council
Most cities offer recreation
swimming at their pools with qualified lifeguards on duty. Call your city's
parks and Recreation Department or community Services office for specific
locations, hours and fees. Some YMCA offices open pools outside their normal
facilities for more affordable fees. Call the YMCA near you for more
information. Some pools require letting them know ahead of time if you are
planning to bring a large group so that they can arrange to have more
lifeguards on hand.
IDEAS FOR
DEN ACTIVITIES:
Baltimore Area
Council
-
Make and cook on a hobo stove
-
Help clean up a stream
-
Go Fishing
-
Go for a hike in a local park
(Take plastic grocery bags and leave the
place looking better than you found it)
-
Make blue gelatin with gummy fish for a snack
-
Hold walnut shell boat races
IDEAS FOR PACK ACTIVITIES:
Baltimore Area
Council
-
Visit the Baltimore Aquarium (or one near
your home)
-
Have a water balloon battle
-
Visit the Goddard Space Flight Center (or
another NASA installation)
-
Visit the Flag House (or see the Star
Spangled Banner from Fort McHenry at the Smithsonian or the Betsy Ross House
or something else historical for the Fourth of July)
-
Hold a Raingutter Regatta (Check it out in
this section!)
-
Visit the C & O Canal (or another water
based historical attraction near you. We visited an historical canal near
Dayton a few years ago)
Fishing
Derby
Baltimore Area
Council
There are a lot of good games listed here
as alternate activities, don’t miss them!!
Also, there are many specifics for
Maryland in here, but I am sure if you check with your local state officials
you will find many of the same programs wherever you live. Go to the “My
Home State” Baloo for the list of state websites for kids if you don’t know
where to start. CD
There are two kinds of Cub Scout Pack
fishing derbies: both are fun for boys and parents.
-
One is a
partner-and-son fishing trip to a nearby lake or river where adults and boys
can fish off the bank or in boats. Small prizes are awarded for the biggest
fish, smallest fish and best string.
-
The other
type is a family outing with games and contests related to fishing. The
ideas listed here are for this kind of derby.
We are quite lucky in the State of
Maryland, that the Department of Natural Resources (DNR) and Fisheries has a
program called "Hooked on Fishing not on Drugs", where the DNR will supply
on a loan basis, rods and reels to Scout units, free of charge. The DNR also
has other resources such as booklets on fishing for youth, the State laws on
fishing in Maryland, and other literature. The Fisheries can stock ponds and
streams for events if open to the public. The also have flyers, posters, and
other items that can be used in your derby. The DNR police are a good source
who will visit a Pack Meeting and explain fishing laws, conservation, water
safety, etc.
In the Baltimore Area Council, the Bass
Masters will do demonstrations on casting and fishing methods. This
organization has several programs depending on the local group which the
boys can win prizes and other awards. In the past, the owner of a local bait
shop has supplied worms or bait for Scouting activities. The State of
Maryland has several other programs which are coordinated through the DNR,
one such program is "My First Fish" for anyone catching their first fish in
Maryland. A form is filled out and a certificate is sent to the fisherman. A
second is, “Catch and Release,” if the Cub catches and then releases a fish
(alive) there is a patch and certificate available that can be obtained from
the DNR.
The fishing derby committee should follow
Cub Scout guidelines for planning special events. Planning includes securing
a site, arranging for transportation, planning activities and obtaining
prizes and arranging for food and equipment. Try special promotional
gimmicks such as invitations in the shape of a fish.
Make identifying signs for each contest
area. Use ropes, posts, colored streamers, and colorful signs to mark game
areas. Consider using a public address system to control the activities, if
necessary and a tape player to provide lively music.
Suggested Fishing
Derby Schedule
1:00 - 2:00 Gathering-time activities
2:00 - 3:30 Special contests
3:30 - 3:45 Awards ceremony
3:45 - 5:00 Free time for fishing
5:00 - 6:00 Meal and
clean-up
You do not need to buy a lot of expensive
equipment to start with. You just need a rod and reel (or a cane pole), some
line and hooks and a few
weights and floats. You also need a
disgorger, or "hook-out", which is a metal or plastic tool used to take a
hook out of the fishes mouth without hurting the fish.
Tackle for the
Job
What about bait?
To catch fish, anglers (fishermen) use
some sort of food, or bait, to tempt fish to bite on the hook. Bait can be
real food, either alive or dead. It can also be an imitation, which is used
to trick the fish. Artificial flies and lures are in this category. So is a
piece of aluminum foil attached to the line.
Knots -
Fishing line is quite smooth and you will
need to learn how to tie special knots that do not slip when tying a hook
onto the line. Always make the line wet before tightening the knot. Test the
knot by pulling from both sides before you start fishing. Have a fisherman
teach you knots that can be used to tie your hook onto you line and then
practice them. Or find pictures that show the knots and practice them.
Games for your
Fishing Derby
You may want to
have some alternate activities ready to go in case the fish are not biting
that day. Or younger Scouts become restless.
Guessing Contest: How many fish eggs are in the jar? Use marbles
for the eggs. The winner gets the jar of marbles.
Snapping Fish Game: This game requires several fishing poles with
sinkers and a piece of foam rubber attached to a 3 -by-4 foot line. Also,
have several mousetraps set to spring. Object of the game is to set off a
trap by hitting it with the foam rubber without getting the line caught in
the trap.
Fish & Net Game: Three to five Cubs join hands to catch fish
(Cubs) by surrounding individual players. Those who are caught become a part
of the "net". The last five Fish caught make up the net for the next game.
Sardines: Select one Cub to be "It". He hides while the
other players count to 100. Then they all search for him. When someone finds
``It" they hide with him. Continue until the last Cub locates "It". The
first Cub that found "It" is the new "It" for the next game.
Fishpond Games: An infinite variety of games are possible with a
"hook", a line, and a pole. Make hooks from coat hanger wire, paper clips,
magnets, or even sticky gloop. Cut fish from felt, cardboard, wood, or sheet
metal. The players can catch the fish by hooking them and lifting them out
of the Ocean or stream. Fish can be marked with different point values or
different colors can be worth different points, or even feats of skill (do a
head-stand or hand-stand).
Crab Relays: Have the first Cub in each line sit on the floor
with his back to the finish line. On a signal, he walks backwards on his
hands and feet with his body parallel to the floor. When he reaches the
finish line, he stands up and runs back and touches the next player. Who
repeats the action, the first team to finish wins.
Rope Throw Rescue: Each Den has a coil of rope or clothesline and
adults representing drowning persons whom must be rescued. The Cubs in turn
throws the rope to a drowning person, who grabs it and let go. The player
recoils the rope and hands it to the next player. Repeat until all have been
rescued.
There is so much that can be done at a
Pack Fishing Derby. Let your imagination run wild. Other games can be:
Harpooner, where a Cub takes aim at a whale with a broomstick (harpoon).
There is also the Fish Market where the Cubs throw slippery fish to their
teammates who have to stack them (The fish are small nerf footballs that
were soaked in baby oil). Casting competitions, mend fishing nets. A chowder
race where each Den has to put an ingredient into the pot to complete the
chowder. The derby can also be ended with a Crab Feast or Clam Bake.
Special Contests
Reeling Relay: Dens and families are arranged in relay fashion.
The first player on each team has a fishing pole and reel. On signal, he
places the fishing pole and reel on the ground in front of him, takes the
plug and runs to a line 25 feet away, unwinding the line as he goes. He then
runs back, sits on the ground, and reels in the line. The next member
follows and so on, until all have played. First team finished wins.
Fishing Relay: The "fishpond" is a large cardboard box turned
upside down, with slots cut in the bottom. In each slot, insert a "fish" cut
from cardboard. On each fish mark a length and weight for it. For each team,
you need a cane pole with a 3-foot string and a bent paper clip for the
hook. Team members line up relay fashion, with the first member holding the
pole. On signal he runs to the fishpond and catches a fish. A judge records
the length and weight. The team with the greatest weight total of fish wins.
Rowing Relay -
Players on each team sit or kneel in a
large cardboard box and propel themselves to the goal line and back by using
two short broomsticks with rubber tips.
Go fishing in the Lake: Prizes could be given for biggest fish caught,
littlest fish, most fish caught, longest fish caught, etc. Inexpensive
fishing tackle might be used for prizes.
Raingutter
Regatta
Baltimore Area
Council

This could be the sailing regatta of the
century! Although the seas are only 10 - foot lengths of raingutter filled
with water and the ships a mere 6 inches long, the race is a very exciting
event. Each boy builds his own boat with supervision and help from parents
or other family members (or selects one available at the derby). He also
provides the wind for the sail with his own lungs.
The regatta boat kit, available from the
local Scout Shop, has a pre-shaped balsa hull, metal keel and plastic sail.
The hulls are sanded and shaped, and painted with colorful lacquer. Hull and
sail are then decorated with decal kits (also available at the Scout Shop).
The boats race in pairs on raingutter courses, propelled by the boys blowing
into the sails.
If you have a number of model boat
enthusiasts in your Pack then you will want to plan a Raingutter Regatta.
Several classes of boats can be raced as long as they are not too big for
your Raingutter course.
Race Course
The course will be determined by
the facilities available. A portable wading pool, regular swimming pool,
pond, lake, or even a good size puddle after a rainstorm can be used for
racing the boats.
The most commonly used course
(and where the race gets its name) is the raingutter.
The course is made of standard rain
gutters 10' long; set in grooves in two sawhorses. Allow sufficient space
around the course for both participants and spectators. With gutters in
place, put a small amount of water into each to make sure they are level.
Make any needed adjustments, and when level, fill to about 1/2" from top.
Running a Rain Gutter Regatta
You will need someone standing at the
start line (to make sure the boats remain at the start line) to say, "on
your mark, get set, go" (i.e., the Cubmaster). The race is a slow enough
event that the Cubmaster can easily take a couple of steps to the other end
of the gutter to declare the winner. However, if there are enough
parents standing around, put them to work. Rules should be established prior
to the event to resolve any difficulties. There are suggested Derby Rules
in the Cub Scout How-To Book.
Boats sometimes seem to "stick'" to the
side of the gutter; however, folding a paper clip and inserting it into the
body of the craft such that a rounded portion of the clip protrudes
approximately 1/8" at locations appropriate such that no portion of the side
of the craft may contact the gutter eliminates "sticking".
Rain Gutter Regattas & Some Variations
Building Instructions
1.
Sandpaper the balsa hull to the desired shape, adhering to the
specifications listed below. First use medium grade sandpaper, and then
finish off with very fine sandpaper.
2.
Give the model two coats of sanding sealer, which can be obtained at a craft
or hobby store.
3.
Using either a hand or electric drill can taper the mast. While you
careful]), turn the dowel, work a piece of sandpaper back and
forth until the desire shape is achieved.
4.
Give the entire model two coats of colored lacquer.
Material for Double Raceway
2 ea. -10 foot lengths of 5" diameter
half round gutter
4 ea. -End caps for gutter rivets or
bolts to end
2 ea. -Trough supports (I" X 4-"
X 36") cut to fit gutter
2 ea. -End braces (1'' X 4" X 23")
2 ea. -Diagonal braces (1-" X
2" X 72")
4 ea. -Legs (2" X 2" X 34")
Several - 1 1/2"#10 Flathead wood screws
(all fastenings) (This will make a frame to support 10' lengths of rain
gutter filled with 8 gallons of water. It can be assembled and disassembled
quite easily.)
Giant Wind-Up
Water Bug
Baltimore Area
Council
Materials:
Two
Styrofoam meat trays, 3" long light thin
rubber bands, pencils, scissors, white glue, sharpie marker, colored pencils
or markers.
Instructions:
1.
Cut the bottoms of the meat trays out and glue them together, making sure
that one of
the trays has the smooth side out.
2.
Transfer the bug and paddle wheel patterns to the smooth side. Use carbon
paper or trace to another sheet of paper, blacken the backside of the
tracing with a #2 pencil or crayon and then trace over the pattern with a
dull pencil.
3.
Cut your bug out of the Styrofoam being sure to include the notches in the
legs for the rubber band.
4.
Decorate the bug with colored markers or pencils.
5.
Stretch the rubber band between the legs. A thin rubber band that fits
without stretching much is essential.
6.
Slip the paddle wheel in the middle of the rubber band loop and wind up
gently. Placing the paddle wheel off center will cause the bug to travel in
circles.
7.
A
toddler's swimming pool is the ideal place to release your bugs. Try having
a Den race.
Octopus Tie Slide
Baltimore Area
Council
Materials: English walnut shell carefully halved; small
wiggle eyes; black chenille stems, black tamper evident ring from a soda
bottle; hot glue; craft glue; black acrylic paint.
Instructions:
1.
Paint the exterior of half a walnut shell black. Let dry.
2.
Consider the pointed end of the shell as the top and use craft glue to
attach the eyes approximately a fourth of the way up from the bottom. Let
dry.
3.
Cut 4 chenille stems in half. Bend each piece in half. Hang them on the soda
ring. Put some hot glue into the shell. And carefully press the eight legs
and ring into the glue, extending them from the rounded end.
4.
When the glue is dry, fill the rest of the shell with hot glue.
Suncatchers
Baltimore Area
Council
Materials:
Find as many patterns as you can from
cookie cutters to children's flat toys, coloring books, anything you can
trace a pattern from. They can be dinosaurs, reptiles, amphibians, birds,
etc.
Also, stapler, translucent plastic lid
(like those on margarine tubs), scissors, colored tissue paper, newspaper,
spray shellac, leather punch, suction cup window hook.
Instructions:
1.
Cut the edge of the lid off leaving a flat plastic disk for the base.
2.
Attach the chosen pattern to the lid by stapling all around the edge.
3.
Cut out the pattern.
4.
Tear the tissue paper into 3/4 "
x 1" strips.
5.
Put the lid on several layers of newspaper and spray with shellac.
6.
Immediately lay pieces of tissue on the pattern, overlapping the strips and
the edge of the pattern.
7.
Spray another layer of
shellac over the top
of
the tissue.
8.
Set aside to dry.
9.
When completely dry, trim the excess tissue from around the edge. And punch
a hole in the top of the suncatcher. Now you are ready to hang it on the
window using the suction cup window hook, plastic side to the window.
Balloon
Powered Boat
Longhorn Council
You will need: 1/2 gallon
milk carton (need 1/2 for each boat); A drinking straw that bends;
Heavy-duty tape; A long balloon; Scissors; A nail.
1.
Cut one side from the carton to make the
boat.
2.
Trim the straw so the part that bends is
exactly in the middle. The straight parts should be about 2 inches each.
3.
Tape one end of the straw inside the
balloon. Secure the tape tightly but don’t collapse the straw.
4.
Using the nail, poke a hole in the bottom of
the carton (the stern of the boat).
5.
Insert the balloon straw “ari jet” through
the hole in the stern. Pull the straw through and bend it at a ninety-degree
angle.
6.
Blow up the balloon. Then hold the end of
the straw with a finger. Launch the balloon boat in the water.
Tub Time
Toy
A tub-time toy that doesn’t need batteries.
It does move on its own.
Longhorn Council
You will need: Waxed
cardboard (e.g. milk or ice-cream cartons, butter boxes); Scissors; Pencil;
Ruler; Waterproof tape (duct tape or strong packing tape); Bar of Ivory
soap.
1.
If you are using cardboard from food
container, wash out the carton well.
2.
Cut a 2" by 3" rectangle out of one side of
your carton. Find the center of a short side of the rectangle, and then use
a ruler to mark a straight line from this center point to the corners at the
opposite end. Fold up along these lines.
3.
Tape up the end of the boat with the
waterproof tape.
4.
Cut a very small wedge from the soap. Then
cut a hole in the back of your boat, making it smaller than the wedge.
5.
Put the boat in a half-full sink, bathtub or
other quiet water. Place the soap wedge into the hole in the boat so that
the point of the wedge is toughing the water. The rest of the wedge sits on
top of the boat. Now watch your boat move forward.
Soap On A
Rope
Longhorn Council
You will need: 2 cups soap
flakes*; 1/2 cup hot water; Egg beater; Food coloring; About 1 yard of cord
or thick yarn. *Grate soft white soap into flakes. Ivory works well.
1.
Pour soap flakes and water into a bowl. Add
a few drops of food coloring, if desired. Beat until evenly mixed.
2.
Gather the mixture in your hands. Press it
into a firm glob.
3.
Knot the ends of the cord together with a
large knot.
4.
Form the soap glob around the cord just
above the knot. Squeeze the glob so it hangs securely from the cord.
5.
Form into a special shape (keep it simple).
6.
Let the soap dry for several days.
7.
Tie another knot just where the cord comes
back out of the soap.
Sand
Candles
Longhorn Council
You will need: Sand;
Flowerpot or similar sized container; Wax block or household paraffin
(approximately ¼ lb. for each candle); Candle wicks (craft store) or waxed
string; Empty can with the label removed; Small pebble; Crayons (optional).
Close Adult supervision is required throughout
this activity!!
1.
MELT WAX: Break up the wax and put pieces in
the empty can. Fill a small pot 1/3 full of water, put the can in the pot
and the pot on the stove over low heat. If you want colored candles, put a
piece of crayon in the melting wax. While the wax melts, prepare the candle
mold.
2.
MAKE MOLD: Fill the flowerpot with MOIST
sand. Dig out the candle shape-- use your hand or press an object into the
sand like a small rubber ball or a small can. Important: You are making the
candle upside down. To make the candles like strange sea creatures, make
large or small holes in the sand jutting out from the basic candle shape
(use your finger or a pencil).
3.
PLACE WICK: When the mold is finished, tie a
pebble to the end of a strand of the wick and embed the pebble in the sand
at the bottom of the mold as shown. Wind the other end of the wick around
the pencil and balance on top of the flowerpot. Make sure the wick is
straight.
4.
POUR WAX: Pour the liquid wax into the mold
carefully. In a few minutes the wax will sink a bit--pour in more wax to
make it level (this will be the bottom of the candle). Let the wax cool
completely.
5.
FINAL STEPS: To unmold, turn the flowerpot
upside down. The sand will come out in a hunk in your hand. Carefully remove
the candle. Brush off as much sand as possible. Let dry and brush off again.
A very thin coating of sand should remain on the candle surface.
VARIATIONS: Instead of
poking small holes, keep the moist sand walls smooth and embed pretty
pebbles and sea shells (shell’s outside to the sand). Or how about making
candles right-side up? You need to keep the bottom of your sandy pit flat
but you don’t have to embed the wick in the sand.
No Care
Aquarium
Longhorn Council
You will need: Two 9" paper
plates; Small amount of sand or aquarium gravel; Two shades of green
construction paper; 8" square of clear sandwich wrap; Glue; Scissors.
1.
Cut center out of one plate and glue clear
sandwich wrap on inside.
2.
Cut a circle of green construction paper and
glue it inside the other plate.
3.
Spread a light coat of glue over a 1” strip
at the bottom of the green circle. Sprinkle sand over the glue. Let dry and
shake off excess sand. Optionally, you may want to use aquarium gravel (you
will need more glue for gravel).
4.
Draw several fish or cut out some pictures
of fish from a magazine. Glue them above the sand on the green circle. Use
lighter shade of green for seaweed. A few wavy lines made with a dark green
marker will make the water look as though it’s moving.
5.
Staple the plates together or sew them
together with colored yarn.
6.
Now you can see the aquarium picture through
the clear sandwich wrap.
VARIATION: In place of
clear wrap, use clear blue cello wrap (used to wrap fruit baskets and the
like, available at a craft store). You will not have to use the construction
paper circle.
Sand
Painting
Longhorn Council
Do this outside where you don’t
mind the sand. Designs should be simple. Younger boys may want to outline
their designs with sand rather than filling it. How about writing their
names with sand?
You will need: Sand;
Several plastic containers with lids; Food Coloring; Newspaper; Heavy tag
board or cardboard; Pencil; Glue.
1.
Put sand in the plastic containers and add a
few drops of food coloring--a different color for each container.
2.
Cover and shake the containers or stir until
the sand is completely colored.
3.
Spread the colored sand out on newspaper for
a few minutes and let it dry while you color more. (Try combining primary
colors.)
4.
Using the pencil, draw a design on the tag
board or cardboard.
5.
Spread glue on the outline of the design.
6.
Cover the outline with one color of sand.
Shake the excess sand back into its container.
7.
Spread glue onto another area of the design,
and then fill it in with another color of sand. Repeat until the entire
design is complete.
8.
Allow to dry (about an hour). Attach a small
piece of string like a loop on the back and hang on the wall.
Layered
Sand Jar
Longhorn Council
You will need: A variety of
colored sands (see the craft above); Nicely shaped clear jar (not too big)
with a lid; Funnel.
1.
Spoon a layer of colored sand into the jar.
Or pour the sand through a funnel into the jar. Gently tap the jar to make
the sand level if you want flat layers.
2.
Continue adding layers of different-colored
sands until you reach the top.
3.
Screw the lid on tightly.
Beach
Ball Neckerchief Slide
Santa Clara County Council
You will need:
One half-ball-shaped wood piece 1
1/2" diameter* (available at a craft store);
Acrylic paint or permanent
markers;
1/2" section of 1/2" PVC pipe;
Thick craft glue or low temp glue
gun.
*If you cannot find half-ball
shapes, cut a wooden ball in half. Be careful, it is small and craft wood
shapes are usually hardwood. Adult should do this.
1.
Paint the wood piece like a beach ball.
2.
Let it dry.
3.
Glue the PVC pipe section onto the flat side
of the 'beach ball'.
Rope
Neckerchief Slide
Santa Clara County Council
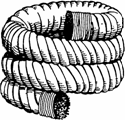
You will need a piece of rope about 8-inches long and a whipping
cord.
Whip both ends of the rope (Bear
Achievement 22).
Lay a bead of low temp glue along
the rope and coil the rope in a circle. It may be easier if you wrap the
rope around a 1/2" dowel, being careful not to glue the rope to the dowel.
Buoy Key
Ring
Longhorn Council
You will need a large
enough piece of cork and twist ties
It floats, so it’s a good gift for
anglers and boaters.
1.
Drill a hole through the middle of a cork.
2.
Insert a large plastic coated twist tie
through the hole in the cork.
3.
Thread the key onto one end and securely
twist the ties together.
4.
Test for buoyancy in a sink filled with
water. If it sinks, try a larger cork or add another one.
Footprints in the Sand
Santa Clara County Council

Capture that barefoot-on-the-beach
feeling -- and a record of your feet -- with this simple plaster-casting
project.
Supplies: Plaster
of Paris, small bucket, freshwater, 4-inch lengths of string (optional)
Directions:
Choose a site to cast your molds
-- the moist, hard-packed sand near the water's edge works best.
Firmly press both feet into the
sand. The prints should be about 1/2 inch to 2 inches deep. (If your child
can't press down that hard, he can use his finger to dig down into the
print, following its shape.)
Mix up the plaster, according to
the directions on the package, so that it has a thick, creamy consistency.
Pour the wet plaster gently into the footprints.
To make hangers, tie a knot about
a half-inch in from each end of the pieces of string. As the plaster begins
to harden, push the knotted ends into the plaster and let dry.
After 20 to 25 minutes, gently dig
the footprints out of the molds and brush away any excess sand. Set
sole-side up in the sun for about an hour to let harden.
Jet Boat
Santa Clara County Council
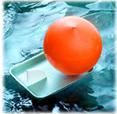
Kids will love being the captain
of this balloon-powered jet boat - perfect for racing in pools, ponds and
bathtubs.
Supplies: Plastic
pipe elbow, 1/2 inch in diameter, and its accompanying plastic nut (ask at
your local hardware store); Two 5 1/2 x 8-inch Styrofoam food trays;
Balloon; Rubber band
Directions:
Thread the nut on the plastic pipe
elbow. Then cut a hole in the bottom of one of the trays and push through
the elbow's non-threaded end.
Stretch the balloon over the
threaded end. Next, secure the elbow underneath the tray with the rubber
band, wrapping it around several times.
Cut a rudder from the other tray,
and insert it through a slit cut in the stern of the boat.
Tips: To operate the
vessel, inflate the balloon by blowing into the elbow. Block the end of the
pipe with your finger as you set the boat in the water, then release it and
watch the boat zip away.